| Summary: | - Applets written in the Curl® language
use the technique of firing an event at a target
to send a message to a program.
- Events are the key to making Curl applets
interactive.
- An event handler refers to an object of the
EventHandler class.
- A dynamic event handler is an EventHandler object that attaches to a specific EventTarget object.
|
Curl applets use the technique of firing an event at a
target to send a message between components of a program or to
notify the program about a user's action affecting a certain
target object on the screen, such as typing into a text field or
moving the mouse over an object. When the target is
notified that an event has occurred, it calls one or more event handlers in response.
This chapter describes events and event targets, how events are
created and fired, and how different kinds of event handlers run
in response to the firing of events. The events generated when
using the keyboard and the mouse to interact with applet windows
are described here in detail.
Events are the key to making Curl applets and
applications interactive. Events are represented by
Event
subclasses. Each
Event subclass represents a specific
type of event that can be fired. For example, clicking on an
object displayed on your screen causes a
PointerPress and
a
PointerRelease event, and dragging the cursor over a
text segment causes a
DragPointerEvent.
Events are fired at objects that act as event
targets. The object you click on and the text you select by
dragging are examples of event targets.
An object can be a target of an
Event only if it is a
subclass of
EventTarget. All graphical objects are
potential targets because they inherit from the
EventTarget class.
EventTarget objects have a list of
dynamic event handlers associated with them that are called when
matching events are fired at them.
When a particular event activity occurs, such as clicking the
mouse button when the pointer is over a graphical object, an event
object representing that type of activity is created, and the
event is
fired with that graphical object as its target.
In the following example, the event target is a
CommandButton, and clicking on it fires an
Action event
at the
CommandButton.
| Example:
A Simple Action Event Handler |
 |
{CommandButton
    label="Click me!",
    {on Action at btn:CommandButton do
        set btn.label = "Thank you."
    }
}
| |
The source code starting with the word
on creates an event
handler that gets attached to the
CommandButton in this
example. The event handler makes the
CommandButton change
the button's label in response to
PointerRelease events, which are a type of
Action event.
In general, any event can be used to signal any series of
operations or changes to the state of the applet, including firing
other events. The source code for such action is contained in event
handlers. A target object can have multiple event handlers, each
prepared to execute its source code when an event of a certain type is
fired at the target. The source code in an event handler can refire the
event at further targets.
A simplified summary of the event mechanism is as follows:
| Event Mechanism: | - A user performs some gesture with the mouse or the keyboard
that is directed toward some graphical object on the screen.
- An event representing that activity is instantiated
and fired at an appropriate target object.
- One or more event handlers attached to the target object
and corresponding to this event now run.
- Any event handler may fire the same event (or new events)
at other target objects, probably triggering other
event handlers.
|
You need to be careful to avoid calling event handlers
recursively, which sometimes happens if an event handler performs
an action that causes the same kind of event to be fired
again. For example, if the handler for a
ViewResizeEvent
changes the view size, or if a
FocusIn event handler
changes the keyboard focus to some other object. The easiest way
to avoid this situation is to use the
{after 0s do ...}
idiom to execute the code that triggers new events. Consider the
following code fragment.
{on FocusIn do
    {after 0s do
        || code-that-changes-keyboard-focus
    }
}
The code that changes keyboard focus is run only after the current
event is fully processed, which avoids possible recursion.
Wrapping an expression in {after 0s do body} has
the effect of adding body to the end of the event queue
because timer events are processed only if there are no other
events.
Each Curl applet has an event queue. Each node on
an event queue consists of an event and an event target at which the event is to be fired.
When the user interface is active, the Curl® runtime
repeatedly executes a standard sequence of operations related to
events called the event loop. The event loop requires the
process to wait for user interactions to generate new event nodes
for the event queue whenever the event queue is empty. When the
event queue is not empty, the event node at the front of the queue is
removed, the event is fired at its designated target, and the
event is handled as required.
Although you don't often need to, you can add events to the event
queue by calling
EventTarget.enqueue-event. This is
called
asynchronous event handling, because the handler
for the enqueued event won't run until after the current event
(and any others that may be in the queue before the new event) are
handled. If you want to fire an event at a target immediately,
without going through the event queue, you can call
EventTarget.handle-event. This is called
synchronous
event handling because the new event is handled immediately,
before returning from the current event handler (if any).
For example, when a
CommandButton detects a
PointerPress followed by a
PointerRelease within the
same button, it enqueues an
Action event on itself. In a
similar way, if the button has the keyboard focus, the
KeyPress event handler enqueues an
Action event
when the space bar is pressed and released. In both cases the
Action event handler performs the same action
associated with the button.
The term
event handler properly refers to an object of
the
EventHandler class. Such an object contains both an
event type (one of the event subclasses) that it responds to and a
procedure that it executes in response to that type of event.
Because an event handler's procedure is the active part of the
object that can be run in response to an event, it is easy to
overlook the distinction between the event handler object and the
procedure it contains. However, it is important to keep in mind
that an event handler's code is only executed in response to
events of the designated class.
There are different types of event handlers, Those event handlers
that are attached to one instance of an object are known as
dynamic event handlers. They are the most widely used
event handlers and can be attached to any
EventTarget
object.
Each
EventTarget object maintains a list of dynamic
EventHandlers. The
EventTarget class has methods
to add and remove event handlers from its list of
EventHandlers. When an event is fired at a target, the target
compares the data type of the event with the event class of every
event handler on its list, walking up the list starting with the
last handler added, and invoking each handler whose event class
matches. Multiple event handlers may apply to a given event.
The next section discusses how to write a dynamic event
handler. but the most commonly used type is created with the help
of the special
on expression. (See the
Using the on Expression section below.)
Events are often reused as an applet runs. If an Event to which you
have made a reference is reused, the information that you want to
store will be incorrect. Event handlers should not keep a reference
to the event after the handler has returned; for example, by
assigning the Event to a global variable or storing it in a field.
The primary steps in creating a dynamic event handler for a
particular object are:
- Writing the code for the event handler procedure
- Specifying the event class to which it applies
- Attaching the code to a particular object (the event target)
You can carry out Steps 1 and 2 at the same time by using the
on expression, which has several variants. In addition, there
are two ways to attach the event handler to a target object, for
Step 3.
First, by including the event handler with the other arguments
when creating an event target object:
| Example:
Including Event Handler in Target |
 |
{CommandButton
    label = "Do not press!",
    || create an event handler for Action events on this button
    {on Action do
        {popup-message "Why did you do that?"}
    }
}
| |
Or by invoking the add-event-handler method on the
target object after it has been created:
| Example:
Using EventTarget.add-event-handler Method |
 |
{value
    let target:CommandButton =
        {CommandButton
            label = "Do not press!"
        }
    || create an event handler and add it to the button already created
    {target.add-event-handler
        {on Action do
            {popup-message "Why did you do that?"}
        }
    }
    target
}
| |
There are several styles of the special on expression.
The following shows the syntax of the simplest form:
{on event-class do body}
- event-class specifies the class of the event it handles.
- body is the code for the event handler procedure.
You can attach this event handler to a graphical object as shown
below.
| Example:
Simplest Form of the on Expression |
 |
{CommandButton
    label={center {bold Invokes an event handler when clicked}},
    || Attach following event handler to this CommandButton
    {on Action do
        {popup-message
            title="Your Message",
            "This is a user message dialog."
        }
    }
} ||CommandButton
| |
Other styles of the
on expression allow you to bind a variable
name to the specific event that the event handler is responding
to, so that you can call methods or look up properties of that
event. Similarly, you can bind a variable name to the event
target and have access to its methods and properties.
| Style | Description |
|---|
| {on event-type do body}
| Specifies the event type only. |
| {on event-var:event-type do body}
| Binds a variable to the event. |
| {on event-type at
target-var[:target-type]} do body}
| Binds a variable to the target. If target-type
is not specified, it defaults to any. |
| {on event-var:event-type at
target-var[:target-type] do
body}
| Binds variables to both the event and the target. |
In all styles:
- event-var defines a variable for the event that was
fired. Use event-var if you need to access methods or
properties of the event.
- event-type specifies the class of the event to
handle. This event handler handles any event that inherits
from event-type. You must specify event-type in all on styles.
- target-var defines a variable for the target
graphical object. Use target-var if you need to
access methods or properties of the target.
- target-type specifies the class of the target. It
is optional, but may be more efficient if you are specifying
target-var. If the actual target is not of this
class and cannot be coerced to this class, a runtime error is
signaled.
Note: In writing a dynamic event handler, you can refer to any variable
that has been defined in the lexical context in which the on expression appears.
The following example displays a rectangle that changes color when
the pointer enters and leaves it. There are two dynamic event
handlers attached to the
Frame, each of which changes the
color by setting the background of the target
Frame. To be
able to refer to this option, the event handlers have to declare a
variable (
rect) to represent their target.
| Example:
Declaring a Target Variable in the on Expression |
 |
{Frame
    width=100pt,
    height=50pt,
    background = "orange",
    || attach the first dynamic event handler
    {on PointerEnter at rect:Frame do
        set rect.background = "cyan"
    },
    || attach the second dynamic event handler
    {on PointerLeave at rect:Frame do
        set rect.background = "magenta"
    }
}
| |
Instead of implicitly attaching an event handler to a
GuiEventTarget by placing it within the target's curly braces,
you can explicitly attach an event handler, created by the
on expression or otherwise, by calling the
GuiEventTarget.add-event-handler method on the target.
In the following example, an
HBox contains two
Frames. The variables
left and
right identify the
left and right frames. An event handler explicitly attached to the
left frame responds to pointer enter and leave events by changing
the color of the right frame. The target is the left frame, but
the event handler acts on the background color of the right frame.
| Example:
Explicitly Adding a Dynamic Event Handler |
 |
{value
    let left =
        {Frame
            background = "orange",
            width=100pt,
            height=50pt
        }
    let right =
        {Frame
            background = "orange",
            width=100pt,
            height=50pt
        }
    let my-hbox =
        {spaced-hbox
            left,
            right
        }

    || attach first event handler to left frame
    {left.add-event-handler
        {on PointerEnter do
            set right.background = "aqua"
        }
    }
    || attach second event handler to left frame
    {left.add-event-handler
        {on PointerLeave do
            set right.background = "magenta"
        }
    }
    my-hbox
}
| |
To remove a dynamic event handler, invoke
EventTarget.remove-event-handler on the target to which the event
handler is attached, supplying the event handler to be removed as
its argument. You need to assign the event handler returned by
the
on expression to a variable of the
EventHandler
class so that you can specify which handler is to be removed.
The following example adds event handlers to a frame when you set
a checkbox to true, and removes them when you set the
check box to false.
| Example:
Removing a Dynamic Event Handler |
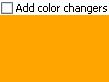 |
{value
    let rectangle =
        {Frame
            width={make-elastic},
            height=50pt,
            background = {FillPattern.get-orange}
        }
    || create a handler for PointerEnter event
    let turn-me-aqua:EventHandler =
        {on PointerEnter do
            set rectangle.background = {FillPattern.get-aqua}
        }
    || create a handler for PointerLeave event
    let turn-me-magenta:EventHandler =
        {on PointerLeave do
            set rectangle.background = {FillPattern.get-magenta}
        }
    || create a checkbutton that will alternately add or remove
    || the color changing event handlers
    let checkbox:CheckButton =
        {CheckButton
            label = "Add color changers",
            {on ValueChanged do
                {if checkbox.value == true then
                    || add color changers when the box is checked
                    {rectangle.add-event-handler turn-me-magenta}
                    {rectangle.add-event-handler turn-me-aqua}
                 else
                    || remove color changers when it is unchecked
                    {rectangle.remove-event-handler turn-me-magenta}
                    {rectangle.remove-event-handler turn-me-aqua}
                }
            }
        }
    {VBox
        checkbox,
        rectangle
    }
}
| |
To understand more about how events are handled and how to change
that behavior, you need to know more about the
Event and
the
EventTarget classes and what kinds of methods are
available for these classes and their major subclasses.
Here is a more detailed view of part of the event class
hierarchy. The most commonly used event classes are
GuiEvent, which includes events relating to graphical user
interfaces, its subclass
GuiWindowEvent, and its subclass
GuiInputEvent, which includes all mouse and keyboard
events. They are the focus of the rest of this chapter.
Similarly, the main event target class is
EventTarget,
whose most important subtype is
GuiEventTarget. The
following is a partial class hierarchy for event targets:
Events are often but not necessarily related to the graphical
interface; they also include I/O events and socket events as well
as timer events. See the
GUI
and Window Events section for more information about GUI Events.
Copyright © 1998-2019 SCSK Corporation.
All rights reserved.
Curl, the Curl logo, Surge, and the Surge logo are trademarks of SCSK Corporation.
that are registered in the United States. Surge
Lab, the Surge Lab logo, and the Surge Lab Visual Layout Editor (VLE)
logo are trademarks of SCSK Corporation.