| Summary: | - Drag and drop functionality is used to perform tasks when
one graphical object is "dropped" on another.
- You can
add
drag and drop functionality to any graphical object.
- A drag and drop relationship must have at least one
"dragee" and one "drop target."
- You can give visual cues (such as a changed cursor) that
communicate the effect of a drop operation.
- Information such as the dragee Type, the
coordinates of the pointer, or the state of the
CTRL key can be used to create more complex
drag and drop operations.
|
The drag and drop (or drag/drop) mechanism of the Curl®
language is used to perform tasks when a user drags a visual
object over another visual object and releases the pointer
button. Common tasks that are performed using drag and drop are
copying, moving, and establishing links between data and objects.
The Curl GUI Toolkit supports a drag/drop mechanism that works
together with the host system's drag/drop mechanism, if it exists.
The drag/drop mechanism is managed by the GUI Toolkit's
GuiManager.
This mechanism allows you to give a user information about the
effect of a drag and drop operation. Special cursors indicate
which of these operations will be performed. The actual task that
is performed by a drag and drop operation is determined by a
procedure that you write.
You can use drag and drop with shapes as well as with
graphics. See section on
Drag and Drop
in the
Shapes chapter.
An easy way to make a Graphic draggable is to set the
Graphic.dragee property of a graphical object to an
ImageDragee.
Events occurring during a drag/drop include:
A simple drag and drop relationship consists of the following
elements:
- A graphical object that can be dragged.
This is called the dragee. - A graphical object that will react when another
graphical object is dropped on it.
This is called the drop target.
Modify standard graphical objects to create these elements.
The steps required to make a drag and drop relationship
are explained below. Each step is illustrated in the
example that follows.
Do the following to create a drag and drop relationship:
- Create a dragee from a standard graphical object,
by setting its Graphic.dragee
option to ImageDragee.
This is the only step required for the object that
is being dragged. See comments in following example. - Create a drop target from a standard graphical
object, by handling the DragOver event on that
object. This includes:
See the following example for a
demonstration.
- Handle the Drop event on the drop
target by:
| Example:
Creating a Simple Drag and Drop Relationship |
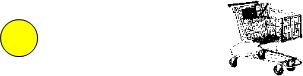 |
{HBox spacing = 5cm, valign = "center",

    || Step 1: this circle is the 'dragee' It can be dragged
    || because the dragee option is set.  NOTE: It must be set to
    || ImageDragee.
    {EllipseGraphic width = 1cm, height = 1cm, dragee = {ImageDragee}},

    {Frame || Step Two: this image is the 'drop target'.
        width = 2cm, height = 2cm,
        background = {Background {url "../../default/images/shopping-cart.gif"}},

        || The following line handles the DragOver event.  You
        || must assign the event to a variable (in this case 'e')
        || so that you can call its will-accept-drop? method.
        {on e:DragOver do
            {e.will-accept-drop?

                || Returns one of the four DragEffect constants.
                || You must include four positional arguments of
                || the same data types, as shown below.
                {proc {type:Type, x:Distance, y:Distance,
                       effect:#DragEffect}:DragEffect
                    {return drag-effect-copy}
        } } }, || stacked for compactness

        || Step Three: The following line handles the Drop event.
        || You must assign the event to a variable (in this case
        || 'e') so that you can call its accept-drop method.
        {on e:Drop do
            {e.accept-drop

                || Return one of the four DropResult objects.  You
                || must include four positional arguments of the
                || same data types, as shown below.
                {proc {a:any, x:Distance, y:Distance,
                       effect:#DragEffect}:DropResult
                    {return {DropResultCopy

                            || The 'action' argument to a
                            || DropResult object specifies what
                            || action occurs when the dragee is
                            || dropped.  Supply a procedure to the
                            || 'action' argument.

                            action = {proc {}:void
                                    {popup-message
                                        "You dropped the ball!",
                                        modal? = true
} } } } } } } } } | |
Your drag and drop relationships are probably more complex than
the one shown above. A drop target in such a drag and drop
relationship must be able to make certain distinctions.
For example:
- It may allow one dragee, but not another, to be dropped
onto it.
- It may take different actions depending on the situation
prevailing when the Drop event occurs.
You may want a drop target to accept certain dragees
but
not others. You can specify whether a dragee can be
dropped on a drop target based on any criteria that you describe,
using the
if expression.
In the simple drag and drop relationship shown at the beginning of
this chapter, there is no need to distinguish between
dragees. Anything dragged over the drop target can be dropped on
it. By making the procedure in
DragOver.will-accept-drop?
more complex, you can control which dragees can be dropped on a
drop target.
When you handle the
DragOver event on a drop target, you
perform two tasks:
- Signaling the effect of a drop to the user
- Determining whether the dragee can be dropped on the
drop target
The following example shows how the
if expression can be
used to determine which dragees can be dropped on a drop target.
In the example, this determination is based on the
Type
of the dragee.
| Example:
Specifying Which Dragees can be Dropped on a Target |
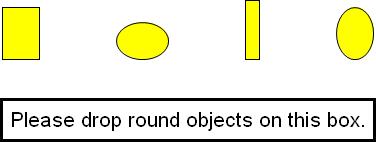 |
{VBox halign = "center", spacing = 1cm,

    || The four objects in this HBox are dragees.  Note that they
    || are of two types, EllipseGraphic and RectangleGraphic.
    {HBox spacing = 2cm,
        {RectangleGraphic
            width = 10mm, height = 14mm, dragee = {ImageDragee}},
        {EllipseGraphic
            width = 14mm, height = 10mm, dragee = {ImageDragee}},
        {RectangleGraphic
            width = 4mm, height = 16mm, dragee = {ImageDragee}},
        {EllipseGraphic
            width = 10mm, height = 14mm, dragee = {ImageDragee}}
    },

    {TextFlowBox    || This TextFlowBox is the drop target.
        border-width = 2pt, border-color = "black", margin = 5pt,
        {text font-size = 16pt, Please drop round objects on this box.},
        {on e:DragOver do
            {e.will-accept-drop?
                {proc
                    {type:Type, x:Distance, y:Distance,
                     effect:#DragEffect}:DragEffect

                    || The following code specifies that
                    || EllipseGraphics can be dropped on the drop
                    || target and  other objects cannot.
                    || Note that the name of the first argument in
                    || the procedure (type) is used to call
                    || methods of the dragee.
                    {if {type.subtype-of? EllipseGraphic} then
                        {return drag-effect-copy}
                     else
                        {return drag-effect-none}
                    }
                }
            }
        },

        || The rest of  code handles the Drop event.  Note that
        || only one DropResult is specified. It is the DragEffect
        || that must distinguish between different dragees.
        {on e:Drop do
            {e.accept-drop
                {proc
                    {a:any,
                     x:Distance,
                     y:Distance,
                     effect:#DragEffect
                    }:DropResult
                    {return
                        {DropResultCopy
                            action =
                                {proc {}:void
                                    {popup-message
                                        modal? = true,
                                        "Success!"
} } } } } } } } } | |
In a more complex drag and drop relationship, you may want a
drop target to take different actions depending on the situation
in which the
Drop event occurs. You can specify what
will occur when a dragee is dropped on a drop target, based on
any criteria that you describe.
Typically, you would use an
if expression to do this.
In the simple drag and drop relationship shown in the beginning
of this chapter, the drop target always takes the same action
regardless of what dragee is dropped on it.
By making the procedure in
Drop.accept-drop more complex,
you can control what will happen when a dragee is dropped on
a drop target.
The following example shows how the
if expression is used
to determine what will occur when a dragee is dropped on a drop
target. In the example, this determination is based on the
Type of the dragee. You
can base this determination
on any criteria.
| Example:
Specifying a DropResult Based on the
Conditions of the Drop |
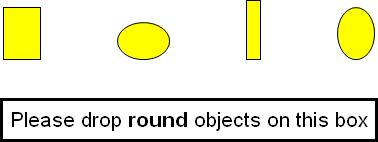 |
{VBox halign = "center", spacing = 1cm,
    {HBox spacing = 2cm,

        || The following four objects are dragees, of two
        || different types (EllipseGraphic and RectangleGraphic).
        {RectangleGraphic
            width = 10mm, height = 14mm, dragee = {ImageDragee}},
        {EllipseGraphic
            width = 14mm, height = 10mm, dragee = {ImageDragee}},
        {RectangleGraphic
            width = 4mm, height = 16mm, dragee = {ImageDragee}},
        {EllipseGraphic
            width = 10mm, height = 14mm, dragee = {ImageDragee}
        }
    },
    {TextFlowBox        || The drop target.
        border-width = 2pt, border-color = "black", margin = 5pt,
        {text font-size = 16pt,
            Please drop {bold round} objects on this box},

        || The following code handles the DragOver event.
        || Any dragee can be dropped on this drop target.
        {on e:DragOver do
            {e.will-accept-drop?
                {proc
                    {type:Type,
                     x:Distance,
                     y:Distance,
                     effect:#DragEffect
                    }:DragEffect
                    {return drag-effect-copy}
                }
            }
        },

        || The following code handles the Drop event.  The
        || 'action' taken depends on the criteria in this 'if'
        || expression.  Note that the name of the first argument
        || in the procedure that returns the DropResult (a) refers
        || to the dragee.
        {on e:Drop do
            {e.accept-drop
                {proc
                    {a:any,
                     x:Distance,
                     y:Distance,
                     effect:#DragEffect}:DropResult
                    {return
                        {DropResultCopy
                            action =
                                {proc {}:void
                                    {if a isa EllipseGraphic then
                                        {popup-message
                                            modal? = true,
                                            "Correct.  The object is round."}
                                     else
                                        {popup-message
                                            modal? = true,
                                            "Wrong!  The object is not round."}
                                    }
                                }
                        }
                    }
                }
            }
        }
    }
}
| |
Both methods take an anonymous procedure as their sole argument.
Both of these procedures
take four positional arguments. You can give the arguments any names
that you wish but the data types must be given in a specific order.
The arguments represent elements of the drag and drop operation such as
the data type of the dragee or the position of the pointer. You can use
the names that you assign to each argument to refer to these elements
in your source code. The procedure supplied to
DragOver.will-accept-drop?
returns a
DragEffect, as represented by these constants:
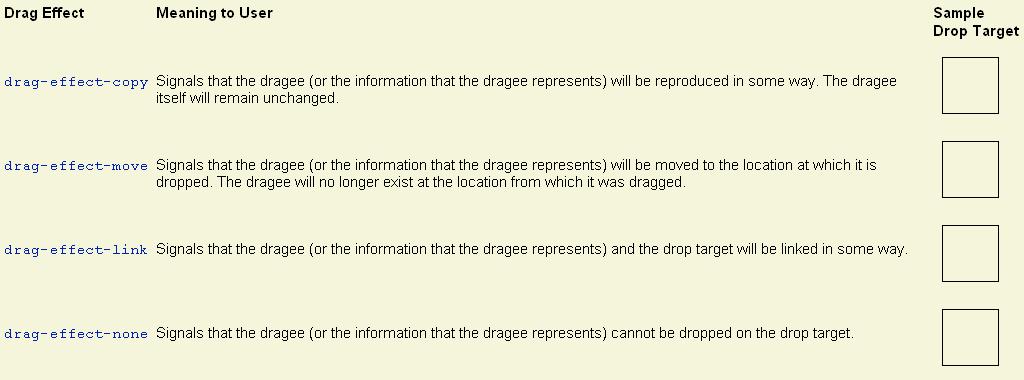
A drag effect is the appearance that the cursor takes on when a
dragee is dragged over a drop target. The appearance of the
cursor gives the user information about what will happen if he or
she releases the pointer button. The Curl language provides four
drag effects: copy, move, link, and none.
When you handle the
DragOver event on a drop target, you
must write a procedure that returns one of these four drop
effects. This procedure is shown in the
simple drag and drop example shown
above. The drag effect that is returned by this procedure has no
effect on the result of the
Drop action. The drag effect
is used only as a signal to the users of your applet.
Drag the black circle over the sample drop targets in
the following table. The cursor will demonstrate
each type of drag effect.

You can allow the users of your applet to choose between the
"copying" and "moving"
DropResults by using the
CTRL key.
Whenever the user of an applet starts a drag and drop operation, a
DragSource object is automatically generated. The
DragSource object has a property (
DragSource.drag-effect) that indicates how the dragee should
behave if it were dropped on the object that it is over at any
time. The value of this property is one of the four drag effect
types: copy, move, link, and none. When a dragee is over a drop
target, the value is "move" by default. If the user presses the
CTRL key, the value will change to "copy."
You can specify both the drag effect and the drop result of a drag
and drop operation based on whether the
CTRL key is
pressed. Use the
DragEffect.has-effect? method to make
this a criterion of the procedures you write to handle
DragOver and
Drop. See the following example for a
demonstration.
| Example:
Using the CTRL key to control Drag and
Drop Operations |
 |
{text Drop the circle on the box while holding down the {bold CTRL}
    key. Then drop the circle on the box without holding it down.}
{HBox
    valign = "center", width = 9cm,

    {EllipseGraphic || the dragee
        width = 1cm, height = 1cm, dragee = {ImageDragee}},

    {Fill width = {make-elastic preferred-size = 10cm}},

    {VBox  || the drop target
        width = 1.5cm, height = 1.5cm, border-width = 1pt,
        border-color = {FillPattern.get-black},
        opaque-to-events? = true,
        {on e:DragOver do
            {e.will-accept-drop?
                {proc
                    {a:Type,
                     b:Distance,
                     c:Distance,
                     d:#DragEffect
                    }:DragEffect

                    || This drop target returns one of two drag
                    || effects based on the state of the
                    || DropSource.  The call to
                    || DragEffect.has-effect? reveals this state.
                    || The DragEffect object is named "d" in the
                    || arguments to this procedure.  If the user
                    || has pressed CTRL, the state of the
                    || DropSource is "copy".
                    {if {d.has-effect? "copy"} then
                        {return drag-effect-copy}
                     else
                        {return drag-effect-move}
                    }
                }
            }
        },
        {on e:Drop at vb:VBox do
            {e.accept-drop
                {proc
                    {w:any,
                     x:Distance,
                     y:Distance,
                     z:#DragEffect
                    }:DropResult

                    || This drop target returns one of two drop
                    || results based on the Dragsource's state, as
                    || revealed by the call to
                    || DragEffect.has-effect?  The DragEffect is
                    || named "z" in the arguments to this
                    || procedure.  If the user has pressed CTRL,
                    || the state of the DropSource is "copy".
                    {if {z.has-effect? "copy"} then
                        {return
                            {DropResultCopy
                                action =
                                    {proc {}:void

                                        || In this case a copy of the
                                        || dragee (w) is added.
                                        {vb.add {w.clone-appearance}}
                                    }
                            }
                        }
                     else
                        {return
                            {DropResultMove
                                action =
                                    {proc {}:void

                                        || In this case the dragee (w)
                                        || itself is added.
                                        {vb.add w}
                                    }
} } } } } } } } | |
The
DragEnter and
DragLeave events can be used
to change the appearance of the drop target to show more dramatically
that something can be dropped over that target. These events are
fired at the drop target when the pointer crosses the
boundary of the drop target.
You then can use
DataTransferSource.get-data-type to get the data
type of the object being dragged, and use that to determine whether
or not to change anything during the drag enter or leave.
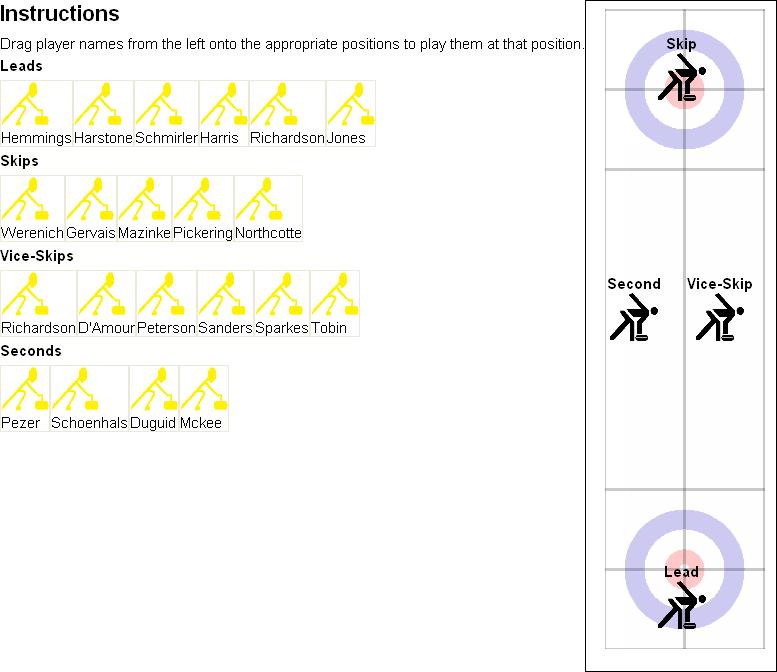
This example uses the game of curling to demonstrate this
technique. In curling, two four-person teams slide heavy stones
toward the center of a circle at either end of a length of ice.
In the game shown below there are a number of players each of whom
can play at one of the four different positions. You can only
drag a player into the position that he or she plays. When you
drag a player over the correct position, the cursor will change
and the background of the position will change color.
Things to note about this example:
- The CurlerPositionTarget object is a subclass of
VBox which defines all of the handlers for drag and drop
events as static event handlers.
- CurlerPositionTarget handles the DragEnter
and DragLeave events by modifying the background of
the target, if the dragee's type is correct. It is important
to make sure that the Drop handler also changes the
background, since if an object is dropped, the target does
not get a DragLeave event.
- The CurlPlayer object is subclassed so that the
CurlerPositionTarget can use the type of player to
determine whether or not the player can be dropped at that
location.
- The data used during drop (the name of the player) is part
of the object being dragged (the CurlPlayer).
- The background only changes color when the pointer crosses into
the drop target, not when the graphical image of the item
being dragged crosses into the drop target.
| Example:
Using DragEnter and DragLeave |
 |
|| curler-position-target creates a drop target for dropping a
|| CurlPlayer of a particular type.  It takes a position string,
|| which it displays, and a position-type, which is compared
|| against the type being dropped.
{define-class CurlerPositionTarget {inherits VBox}
  field position:String
  field position-type:Type

  || display holder for adding the name of the player.
  field name-holder:TextFlowBox

  {constructor {default
                   position:String,
                   position-type:Type
               }
    set self.position = position
    set self.position-type = position-type
    set self.name-holder = {TextFlowBox}

    || construct a VBox, which is the drop target.  Its contents
    || are the position name, a picture, and then the name-holder,
    || which will be modified when the drop occurs.

    {construct-super
        halign = "center",
        {bold {value position}},
        {image
            source = {url "../../default/images/curler3-transparent.gif"},
            width = 0.5in, height = 0.5in, blocking? = true
        },
        self.name-holder}}

  || DragOver handler compares the type being dragged
  || to the type that we accept.
  {method public {on-drag-over e:DragOver}:void
    {e.will-accept-drop?
        {proc {t:Type, x:Distance,
               y:Distance, effect:#DragEffect}:DragEffect
            {if {self.right-player-type? t} then
                {return drag-effect-copy}
             else
                {return drag-effect-none}}
            {e.consume}
        }}}

  || Drop handler makes sure that the right type is dropped.  If
  || so, it adds the name in dragee to the display by changing the
  || contents of the name-holder.
  {method public {on-drop e:Drop}:void
    || Make sure to remove any background added by
    || the DragEnter handler
    {unset self.background}
    {e.accept-drop
        {proc {a:any, x:Distance,
               y:Distance, effect:#DragEffect}:DropResult
            {if {self.right-player-type? {type-of a}} then
                {return
                    {DropResultCopy
                        action = {proc {}:void
                                     let name-holder:TextFlowBox = self.name-holder
                                     {name-holder.clear}
                                     {name-holder.add a.player-name}
                                     {e.consume}
                                 }}}
             else
                {return {DropResultNone}}}
        }
    }
  }

  || DragEnter handler sets the background if we are over the
  || right type of object
  {method public {on-drag-enter e:DragEnter}:void
    let right-type?:bool = true
    {e.dss.for-each
        {proc {ds:DataTransferSource}:void
            {unless {self.right-player-type? {ds.get-data-type}}
             do set right-type? = false}}}
    {if right-type? then
        set self.background = "yellow"}
    {e.consume}
    {super.on-drag-enter e} || Call the superclass implementation
  }
  {method public {on-drag-leave e:DragLeave}:void
    {unset self.background}
    {e.consume}
    {super.on-drag-leave e} || Call the superclass implementation
  }
  {method private {right-player-type? t:Type}:bool
    {return (self.position-type == t)}
  }
}

|| CurlPlayer is an abstract class whose subclass can
|| be dropped on a curler-position-target.
{define-class abstract CurlPlayer {inherits VBox}
  || player name
  field player-name:String

  {constructor {default player-name:String}
    set self.player-name = player-name
    {construct-super
        {Frame
            {image
                source = {url "../../default/images/curler4-transparent.gif"},
                blocking? = true},
            width = 0.5in,
            height = 0.5in
        },
        player-name,
        border-width = 1pt,
        text-selectable? = false,
        || All you have to do to make it draggable
        dragee = {ImageDragee}
    }
  }
}

|| Derivations for skip, vice-skip, second, and lead.
{define-class CurlSkip {inherits CurlPlayer}
  {constructor {default player-name:String}
    {construct-super player-name}}}

{define-class CurlViceSkip {inherits CurlPlayer}
  {constructor {default player-name:String}
    {construct-super player-name}}}

{define-class CurlSecond {inherits CurlPlayer}
  {constructor {default player-name:String}
    {construct-super player-name}}}

{define-class CurlLead {inherits CurlPlayer}
  {constructor {default player-name:String}
    {construct-super player-name}}}

|| Main display code
{value
    || create a canvas on which to put the curler-position-target
    || objects.
    let c:Canvas = {Canvas
                       width = 2in,
                       height = 7in,
                       border-color = "black",
                       border-width = 1pt
                   }

    || background image is the curl playing surface.
    {c.add {image
               source = {url "../../default/images/sheetofice2.gif"},
               blocking? = true},
        x = .2in, y = 6.75in}

    || add the curler-position-targets for the positions.
    {c.add {CurlerPositionTarget "Skip", CurlSkip},
        x = 1in, y = 0.5in}
    {c.add {CurlerPositionTarget "Second", CurlSecond},
        x = 0.5in, y = 3in}
    {c.add {CurlerPositionTarget "Vice-Skip", CurlViceSkip},
        x = 1.4in, y = 3in}
    {c.add {CurlerPositionTarget "Lead", CurlLead},
        x = 1in, y = 6in}

    || Here's what gets displayed:
    {HBox
        valign = "top",
        || VBox contains instructions and players.
        {VBox
            spacing = 4pt,
            {TextFlowBox
                {bold { big Instructions}},
                {paragraph Drag player names from the left onto the appropriate
                    positions to play them at that position. }

            },
            {bold Leads},
            {RasterBox
                {CurlLead "Hemmings"},
                {CurlLead "Harstone"},
                {CurlLead "Schmirler"},
                {CurlLead "Harris"},
                {CurlLead "Richardson "},
                {CurlLead "Jones "}},
            {bold Skips},
            {RasterBox
                {CurlSkip "Werenich"},
                {CurlSkip "Gervais"},
                {CurlSkip "Mazinke"},
                {CurlSkip "Pickering "},
                {CurlSkip "Northcotte"}},
            {bold Vice-Skips},
            {RasterBox
                {CurlViceSkip "Richardson"},
                {CurlViceSkip "D'Amour"},
                {CurlViceSkip "Peterson"},
                {CurlViceSkip "Sanders"},
                {CurlViceSkip "Sparkes"},
                {CurlViceSkip "Tobin"}},
            {bold Seconds},
            {RasterBox
                {CurlSecond "Pezer"},
                {CurlSecond "Schoenhals"},
                {CurlSecond "Duguid"},
                {CurlSecond "Mckee"}
            }
        }, || VBox
        c  || instantiate the Canvas object
    } || HBox
} || main display code
| |
You can use the
x and
y parameters to
Drop.accept-drop and the
Dragee.get-drop-offsets methods
to construct a
Drop handler which positions the dropped
object in the exact location on which the object was dropped. This
can be used to construct an application where drag and drop can be
used to position an object.
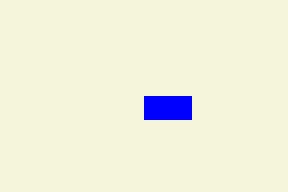
In the following example, a draggable frame can be dropped anywhere on
a canvas and positioned at the location at which it was dropped.
| Example:
Using the Dragee's Drop Offset |
 |
|| SimpleEditableCanvas is a drop target
{define-class public SimpleEditableCanvas {inherits Canvas}
  {constructor {default ...}
    {construct-super ...}
  }

  {method public {on-drop e:Drop}:void
    {e.accept-drop
        {proc {a:any,
               x:Distance,
               y:Distance,
               effect:#DragEffect}:DropResult
            || Only support move
            {if {effect.has-effect? "move"} then
                {return {DropResultMove action =
                    {proc {}:void
                        || get the dragee option from
                        || the object being dropped
                        let dragee:Dragee = a.dragee
                        || compute the new position in the drop
                        || container
                        let (real-x:Distance, real-y:Distance) =
                            {dragee.get-drop-position x, y, self}
                        {self.add a, x = real-x, y = real-y}
                    }}}
             else
                {return {DropResultNone}}
            }
        }}
    {e.consume}
    {super.on-drop e}
  }

  {method public {on-drag-over e:DragOver}:void
    {e.will-accept-drop?
        {proc {t:Type,
               x:Distance,
               y:Distance,
               effect:#DragEffect}:DragEffect
            || only supports move
            {if {effect.has-effect? "move"} then
                {return drag-effect-move}
             else
                {return drag-effect-none}
            }
        }}
    {e.consume}
    {super.on-drag-over e}
  }
}

{value let simple-canvas =
    {SimpleEditableCanvas
        width = 3in,
        height = 2in,
        background = "beige"}
    let simple-canvas-obj =
        {Frame
            width = 0.5in,
            height = 0.25in,
            background = "blue",
            dragee = {ImageDragee}
        }
    {simple-canvas.add simple-canvas-obj, x = 1.5in, y = 1in}
    {value simple-canvas}
}
| |
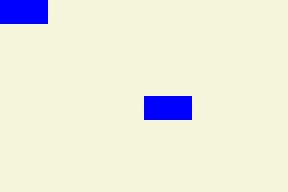
The following example defines a class named SimpleDraggableFrame.
If you select both of the frames in the canvas and drag, both frames will
be dragged and moved. To select both of the frames, first select one, hold
down the CTRL key, and then select the other.
| Example:
Dragging Multiple Objects |
 |
|| A frame that is both draggable and selectable
{define-class SimpleDraggableFrame {inherits Frame}
  {constructor {default ...}
    {construct-super.Frame
        dragee = {ImageDragee},
        background = "blue",
        graphic-selectable = {GraphicSelectable},
        ...
    }
  }
}

{define-class SimpleEditableCanvas {inherits Canvas}
  {constructor {default ...}
    {construct-super ...}
  }

  {method public {on-drop e:Drop}:void
    {e.accept-drop
        {proc {a:any,
               x:Distance,
               y:Distance,
               effect:#DragEffect}:DropResult
            || Only support move
            {if {effect.has-effect? "move"} then
                {return {DropResultMove action =
                    {proc {}:void
                        || get the dragee option from
                        || the object being dropped
                        let dragee:Dragee = a.dragee
                        || compute the new position in the drop
                        || container
                        let (real-x:Distance, real-y:Distance) =
                            {dragee.get-drop-position x, y, self}
                        {self.add a, x = real-x, y = real-y}
                    }}
                }
             else
                {return {DropResultNone}}
            }
        }}
    {e.consume}
    {super.on-drop e}
  }

  {method public {on-drag-over e:DragOver}:void
    {e.will-accept-drop?
        {proc {t:Type,
               x:Distance,
               y:Distance,
               effect:#DragEffect}:DragEffect
            || only supports move
            {if {effect.has-effect? "move"} then
                {return drag-effect-move}
             else
                {return drag-effect-none}
            }
        }}
    {e.consume}
    {super.on-drag-over e}
  }
}

{value
    let simple-canvas:SimpleEditableCanvas =
        {SimpleEditableCanvas
            width = 3in,
            height = 2in,
            background = "beige"
        }

    {simple-canvas.add
        {SimpleDraggableFrame
            width = 0.5in,
            height = 0.25in},
        x = 1.5in,
        y = 1in
    }

    {simple-canvas.add
        {SimpleDraggableFrame
            width = 0.5in,
            height = 0.25in},
        x = 0in,
        y = 0in
    }

    {DiscreteGraphicSelectionFrame
        simple-canvas
    }
}
| |
You can use the drag and drop mechanism to drag files from the
Windows® Explorer into a curl applet. The
object dropped on the drop target is an
Array-of Url. Each
Url corresponds to one of the dragged files.
The following example illustrates dragging and dropping
files. Select one or more files, drag them, and drop them on the
silver square. The
VBox accepts the drop, and the
procedure
process-urls adds the corresponding file names
to the box.
| Example:
Drag and Drop a File |
 |
{define-proc {process-urls urls:{Array-of Url}}:void
    {vb.clear}
    {for url in urls do
        {vb.add url.filename}
    }
}
{let vb:VBox =
    {VBox
        background = "silver",
        {Frame width = 2cm, height = 2cm}, ||give box initial size
        {on e:DragOver do
            {e.will-accept-drop?
                {proc {type:Type, x:Distance, y:Distance,
                       effect:#DragEffect}:DragEffect
                    {return
                        {if type == {Array-of Url} then
                            drag-effect-copy
                         else
                            drag-effect-none
                        }
                    }
                }
            }
        },
        {on e:Drop do
            {e.accept-drop
                {proc {a:any, x:Distance, y:Distance,
                       effect:#DragEffect}:DropResult
                    {return
                        {DropResultCopy
                            action = {proc {}:void
                                         {type-switch a
                                          case urls:{Array-of Url} do
                                             {process-urls urls}
                                         }
                                     }
                        }
                    }
                }
            }
        }
    }
}
{value  vb}
| |
Copyright © 1998-2019 SCSK Corporation.
All rights reserved.
Curl, the Curl logo, Surge, and the Surge logo are trademarks of SCSK Corporation.
that are registered in the United States. Surge
Lab, the Surge Lab logo, and the Surge Lab Visual Layout Editor (VLE)
logo are trademarks of SCSK Corporation.